

こんにちは!いっちーです。
今回の記事は前回に引き続き、Firebase Authenticationを使用したログイン実装の方法に関して紹介します。
前回の記事ではFirebase Authenticationの概要からプロジェクトを作成・ログイン実装まで解説しているので、
よろしければそちらの記事もご覧ください。

ログイン〜ログアウトまでの流れを実装できればユーザー管理は完成です!
ログイン状態を判定
ログイン状態を判定して、ログインしていない場合はログイン画面に遷移させる実装を行います。
以下のようにrouter/index.jsを編集します。(※Vue Routerを使っています)
import Vue from 'vue';
import VueRouter from 'vue-router';
import firebase from 'firebase';

Vue.use(VueRouter);

function loadComponent(componentName) {
  return () => import(`@/components/${componentName}.vue`);
}

const routes = [
  {
    path: '/',
    name: 'Home',
    component: () => import(`@/views/Home.vue`),
    meta: { requiresAuth: true },
  },
  {
    path: '/login',
    name: 'Login',
    component: loadComponent('Login')
  },
  {
    path: '/logout',
    name: 'Logout',
    component: loadComponent('Logout'),
    meta: { requiresAuth: true },
  },
  {
    path: '/about',
    name: 'About',
    component: () => import(`@/views/About.vue`),
    meta: { requiresAuth: true },
  }
];

const router = new VueRouter({
  mode: 'history',
  base: process.env.BASE_URL,
  routes
});

// 認証状態をチェック
router.beforeEach((to, from, next) => {
  const requiresAuth = to.matched.some(record => record.meta.requiresAuth);
  if (requiresAuth) {
    // 認証状態を取得
    firebase.auth().onAuthStateChanged(function (user) {
      if (user) {
        next();
      } else {
        // 認証されていない場合
        next({ name: 'Login' });
      }
    })
  } else {
    next();
  }
});

export default router;
ルートメタフィールド
ログイン後にのみ表示したい画面に、ルートメタフィールドを設定します。
以下の部分がルートメタフィールドです。
meta: { requiresAuth: true }認証が必要な画面のルーティング設定にルートメタフィールドを設定していきます。
グローバルビフォーガード
次にグローバルビフォーガードの設定をして、認証状態が確認できない場合はログイン画面へと遷移させます。
ソースでは以下の部分に該当します。
// 認証状態をチェック
router.beforeEach((to, from, next) =>{
  const requiresAuth = to.matched.some(record => record.meta.requiresAuth);
  if (requiresAuth) {
    // 認証状態を取得
    firebase.auth().onAuthStateChanged(function (user) {
      if (user) {
        next();
      } else {
        // 認証されていない場合
        next({ name: 'Login' });
      }
    })
  } else {
    next();
  }
});
onAuthStateChanged()でユーザーの状態を確認し、認証されていない場合は/loginに遷移させています。
これでログイン状態を判定して、ログインしていない場合はログイン画面へ遷移させることができました!
ログアウト
最後にログアウトを実装します。
Logout.vue
<template>
  <v-card
    class="pa-5 ma-auto"
    width="50%"
  >
    <div class="logout">ログアウトしますか?</div>
    <v-btn
      class="ma-3"
      color="gray"
      @click="$router.go(-1)"
    >戻る</v-btn>
    <v-btn
      color="grey lighten-1"
      dark
      @click="logout()"
    >ログアウト</v-btn>
  </v-card>
</template>

<script>
import firebase from 'firebase';
import router from '@/router';

export default {
  name: 'Logout',
  methods: {
    logout() {
      firebase.auth().signOut()
      .then(() => {
        // ログイン画面に遷移
        router.push({ path: '/login' });
      })
      .catch(() => {
        alert('ログアウト失敗')
      });
    }
  },
}
</script>

<style scoped>
.logout {
  font-size: 40px;
  font-weight: bold;
}
</style>
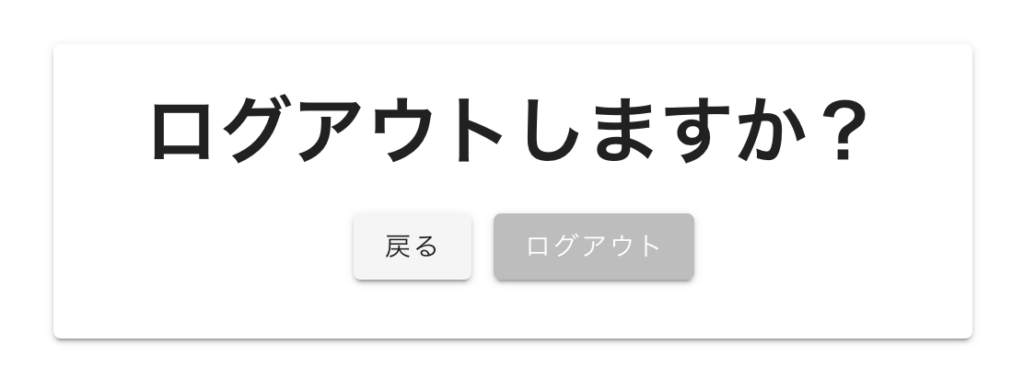
上記のコンポーネントからこのような画面が表示されます。
ログアウト部分の実装は以下のみで完結です。
logout() {
  firebase.auth().signOut()
  .then(() => {
    // ログイン画面に遷移
    router.push({ path: '/login' });
  })
  .catch(() => {
    alert('ログアウト失敗')
  });
}
firebase.auth().signOut()を叩くことでログアウトできます。ログアウトに必要な実装は1行です。
これでログイン〜ログアウトまでの流れは実装完了です!
お疲れ様でした!
さいごに
前回と今回の記事でFirebase Authenticationを使用したログイン機能の実装方法に関して紹介しました。
ログイン関連のロジックはどれも数行で実装できるものなので、
皆さんもアプリを作成する時にFirebase Authenticationを使ってみてはいかがでしょうか?
参考リンク
Firebase Authentication(Google公式)
ウェブサイトで Firebase Authentication を使ってみる(Google公式)
Vue.js+Firebase Authenticationで認証画面を爆速実装!
Firebase関連おすすめ書籍
改訂新版 Vue.jsとFirebaseで作るミニWebサービス
その他
ブログランキングに参加しています\(^^)/よろしければ下のボタンをポチッとしていただけると嬉しいです。
にほんブログ村


コメント